AliciaDelanoDesigns
Cards and Crafts
Monday, September 12, 2016
Double Z fold card
I love making z fold cards they are so simple and do not require a lot of measuring but you still get a interesting card.
This is a card I made for my granddaughters 6 Birthday I used stickers along with the number 6 I cut out from my silhouette.
The little girl sticker I have had forever and the antique lace trim sticker is a dollar tree sticker!!!.
I often see Double Z fold cards and the measurements are usually for smaller a2 cards which I don't normally make but it is simple to make them any size you want. First you always cut 11 inch pc of paper the next measurement is what ever size you want your finished cards length to be. I wanted my card to be 7 inches in length when finished. No matter what finished length you always score at 5 1/2,and 2 3/4 on the 11inch side. The next step is just to fold in a accordion style with a hill and valley . The extra strip at the bottom is cut 11x 1 1/2 you score exactly like you did the base then adhere to the card starting with the longest section first.
This is a quick and easy card don't be afraid to give it a try.
Wednesday, August 17, 2016
Faux Mosaic
Faux Mosaic

Friday, August 21, 2015
Lunchbag cards
Now that school is back in I'm sure you have some lunch bags around the house so why not make a easy card.
You can make these any size you want my favorite size is 5x5. You can make the 5x5 size just by folding up the bottom and trimming the top off so that it is 5 inches tall. The rest is just embellishing and adhering the folded end to the bag.
Here are a few paper bag cards for inspiration.
Thursday, March 26, 2015
Mini Baby Album (part 1)
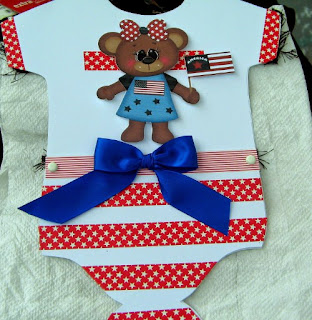
I love mini albums and always say I am going to do more heck I have a whole Pinterest board dedicated to mini albums. Well I got the chance to do one for my sister to give at a upcoming baby shower. The mini album is done in the shape of a onesie and decorated in girly fashion. Each of the onsies has a front pocket to hold mats for photos each mat has a month up to 12months
.
Be sure to come back to see the rest of the album and more details along with the card. Alicia
.
Be sure to come back to see the rest of the album and more details along with the card. Alicia
Ooops Magnolia Birthday Card
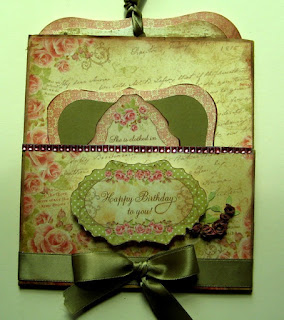
This Birthday card was inspired by this invite http://ascrappersmusings.blogspot.com/2013/05/mini-monday-by-not-mamas-and-papas.html I loved the shape of that card and the use of the silverware as embellishments was so clever. I hope the recipient of my card is pleased with this case .
until next time Alicia
until next time Alicia
Wednesday, January 7, 2015
Happy New Year 2015!
Happy New Year and hopefully that means I will also keep up with my blog in 2015
Todays card is a simple print and cut from the silhouette site. The New Year sentiment was a free file and the New Year mouse was purchased. I printed two images of the mouse and one mouse outline as just a basic die cut. The basic cut was just a outline that I used for shadow layering instead of printing the image I just cut it like a regular die cut. My little mouse then has three layers two printed and one solid. I used foam dots to pop the images and some glitter boarder stickers to add a festive look.
Hope you all have a creative 2015.
Alicia
Saturday, August 23, 2014
baby onsie part 2
Hello all here is the second part of my onsie album. These are the last 6 months I used cereal weight chipboard for the front and back covers and heavy weight cardstock for the insides backing them back to back for more weight. I'm sorry I don't have a photo of the mats I used for the mother to be to put the photo's on but they slip right down the bottom part of the onsie. Thanks for stopping by.
Subscribe to:
Posts (Atom)


